+of+crochet+rocks-8.jpg)
+of+crochet+rocks-12.jpg)
+of+crochet+rocks-14.jpg)

+of+crochet+rocks-9.jpg)


If you've a mind to make one of these beauties I'm laying out instructions here for you. I will also be teaching this at Stash Needle Art Lounge - two 3 hour classes in July and two in August . It should be great fun so come on and join us. You can access the schedule for Stash's classes here
OK...here we go:
Crochet for Rocks 1,
Degree of difficulty - Easy
Stitches used. Chain
(ch), slip stitch (sl st), double crochet stitch (dc).
Materials. 5 wt crochet cotton and 2.25 mm crochet
hook, and a rock…of course.
Instructions:
Chain 8. Sl st to first ch to form a ring.
Round 1: Into the centre of the ring, * Ch4: 1 dc, ch2* 15 times. Sl st in 2nd ch at beginning of
round.
Round 2: ch 2, 1 dc in first ch2 space below, ch2: *2dc
in next ch2 sp, ch2* around. Sl st in 2nd ch at
beginning of round.
Round 3: ch 6; *dc
in ch2 sp below, ch 4* around. Sl st in 2nd ch at beginning of the
round.
*While your work is still flat, stop and tail in that centre
thread. This will save you grief later.
Now it is time to lay your work on the top of your chosen
rock and measure it. It should be
exactly the same dimension as your rock top – if not, do another round like
round 3.
If your work is the same dimension as the top of your rock,
it is time to shape your work.
Next round:
ch 5 *dc in ch 4 sp below, ch 3*
around. Sl st to 2nd ch at
the beginning of the round.
*Things should be starting to curl in. Slip your rock into the work. How does it fit? If you’re happy with the way it is
fitting…let’s carry on. If you’re
thinking it still isn’t quite big enough , do one more crochet round like the
one you just finished. If the curl is too tight and you can’t insert
your rock, you’ll have to pull out the round. Try making one more ch st between
dc’s. You have to be a bit flexible
here. It is all about fit after
all and every rock is different.
Next round: ch 4 *dc in ch 3 sp below, ch 2* around. Sl st to 2nd ch at the beginning
of the round. Insert the stone into the
work.
Note: From here on in, the work is completed with
the stone inside. This can be a bit
awkward so persevere. You’re almost
there.
Last round: Ch 2 *dc in each ch 2 space around. Snug
it up, end off, and tail in your end. Your crochet cover should fit tightly around
your rock.
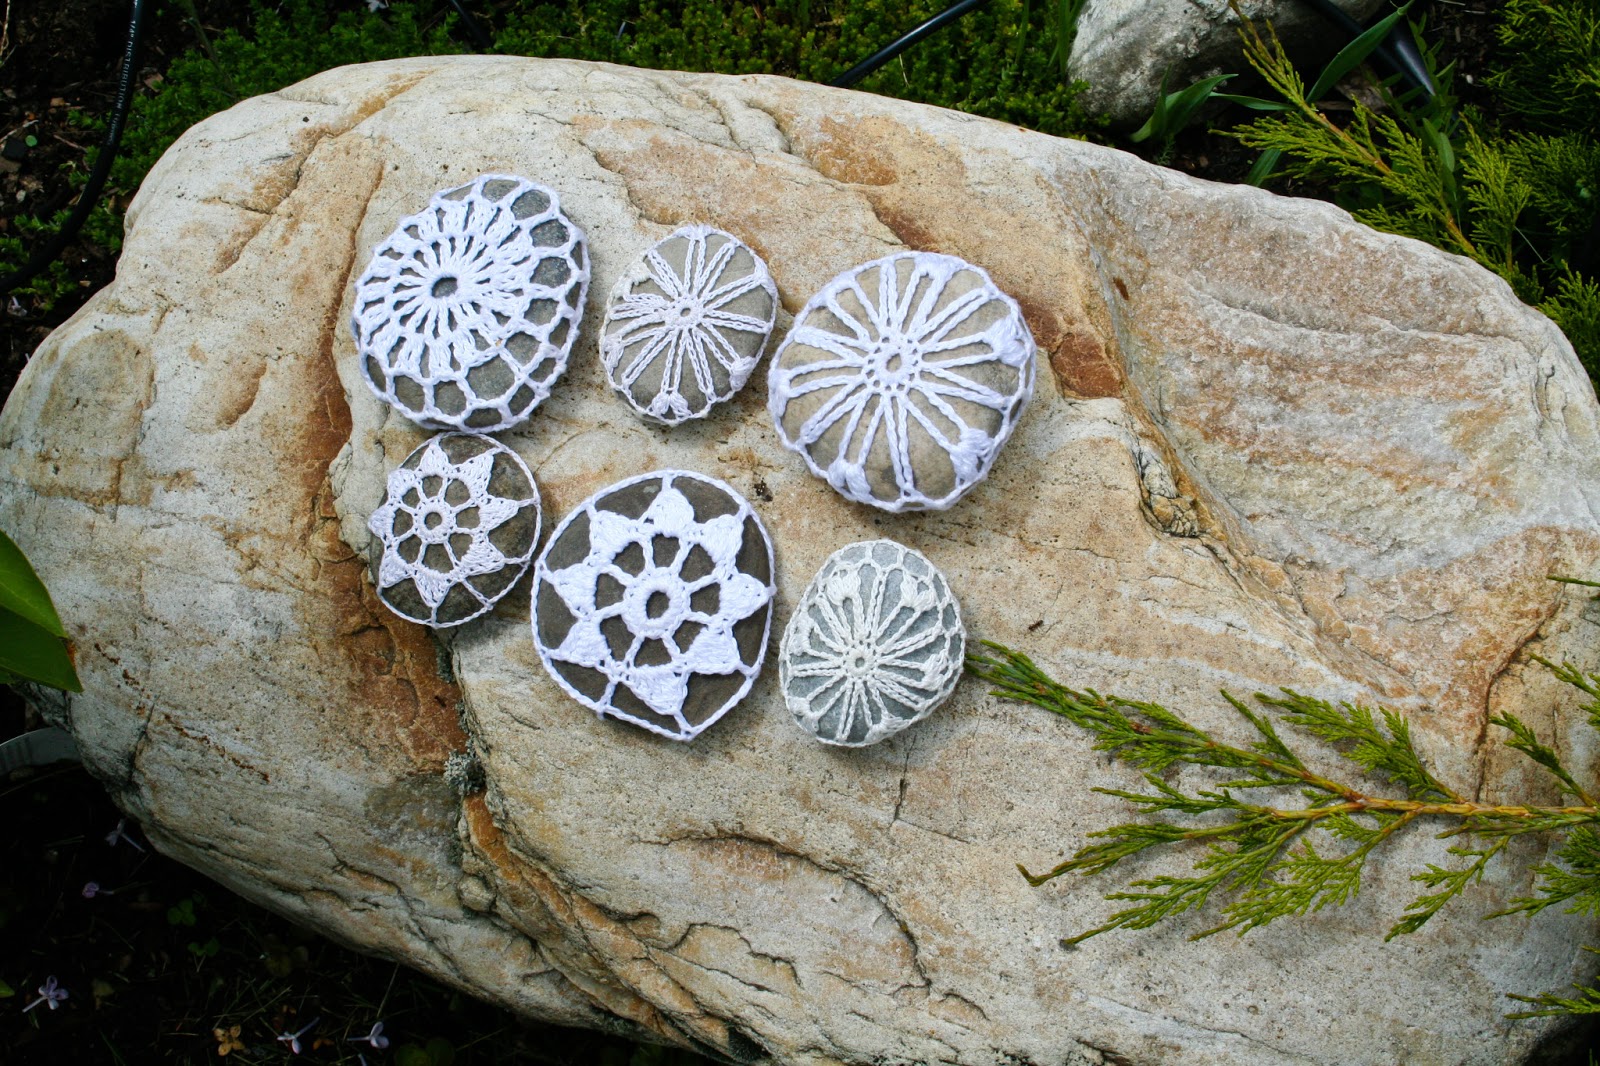
Enjoy your rock! These
crochet rocks make lovely paper weights, door stops, fun gifts, decoration- where ever your
imagination takes you.
If you are looking for a bit more of a challenge you can try this one:
Crochet for Rocks 2. –
Degree of Difficulty – Intermediate.
Stitches used. Chain (ch), slip stitch (sl st), single
crochet (sc), double crochet (dc), Treble crochet (tr)
Materials
: 5 wt crochet cotton, 2.25 mm hook,
suitable rock.
Instructions:
Ch 8 and sl st to first chain to form a ring.
Round 1: Make 16 sc in ring, sl st to first sc.
Round 2:
Ch3 – counts as first dc; *ch 4, skip 1 sc, 1 dc in next sc* around, sl st to
3rd ch of starting ch 3. 8 ch4 spaces.
Round 3:
Ch 1. In each ch 4 space, work: 1 sc, 1
dc, 2 tr, 1 dc, 1 sc, around. Sl st to
ch 1 beginning of round.
Round 4: ch 3 – counts as first dc. *ch 6, dc between
2 tr, ch 6 * around. Join with sl st to
3rd chain of ch 3 at beginning of round
Measure your work against the top of the rock you are
covering. They should be exactly the
same. If they are not, make another
round like round 4.
If they are the same, continue onto round 5:
Round 5: This is where we start to curl around the
sides of the rock.
Ch
3, counts as first dc *ch 5, dc in top of dc below* around. Join with sl st to 3rd ch
beginning the round.
Round 6: Fit the stone into your work. Round 6 is completed with the stone in place,
as follows.
Ch
2; * dc in ch 5 sp, dc in dc below*, around.
Sl st to 2nd ch of
beginning ch 2. End off, pull work snug,
tail in your end.
Note: This pattern is designed for rocks
approximately 3 to 3 ½ inches or 8-9 cm. If you find or love a bigger rock that’s
OK. Your flat rounds will be the same – that’s
the centre design – and then at round 4,
you will need to do more rounds to cover the surface and sides of your
rock. If you are working with a smaller
rock, you might have to eliminate a round. One must be flexible when crocheting around a
rock – because the rock won’t move, which means you will have to.
And if you have good crochet skills and are comfortable with small hooks and crochet cotton - try this one:
Crochet for Rocks 3 - not for the faint of heart…but really not too
bad. You must know how to do the following to
complete this design:
Stitches used:
slip stitch (sl st) chain, (ch),
single crochet (sc), double crochet (dc), double crochet cluster (dc cl)
Yarn over (yo) Half double crochet (hdc)
Special stitches – double crochet cluster: yarn over, insert hook into stitch or loop
below, draw up loop – you have three loops on hook, yo draw through two loops,
yarn over, insert hook back into same stitch below, draw up loop, yarn over and
draw hook through two loops. Three
loops are left on the hook. Yarn over,
insert hook back into the same stitch below, draw up loop, yarn over, draw hook
through two loops, yarn over, draw through all remaining loops on hook. One dc cluster made. (dc cl)
Materials:
5 wt crochet cotton, 2.25 mm hook, and a suitable rock
Instructions
Make 5 ch,
join into ring with sl st.
Round 1:
Ch 1, make 11 sc into centre of ring, sl st to 1st ch.
Round 2:
*Ch 13, sl st into next sc* - around , sl st to sl st at end of round
one. 12 chain petals made.
Round 3:
Sl st into first 6 ch on first loop.
Make 1 dc cl, ch 3, 1 dc cl, ch 4
in top of this loop. In top of next ch 13 loop make 1 sc, ch 4 . continuing this pattern, make * 1 dc cl, ch
3, 1 dc cl, ch 4 in top of next ch 13 loop, 1 sc, ch 4 in next loop* around. Join with sl st to the top of the first dc cl
made.
A Note of caution: Be careful not to twist your loop petals when
working round 3.
Now is the
time to measure your work against the rock you are covering. It should cover the entire top of the
rock. Now is also the time to tail in
your beginning tail because once you have inserted your rock and crocheted
around it, you won’t be able to get at that tail easily.
Round 4:
Sl st into first 2 ch of the ch 3 sp between the first cluster pair, ch
2 (counts as 1 dc) *ch 3, dc in next ch
sp * around. Sl st to 2nd ch
2 at beginning of round.
Round 5:
sl st to middle of first ch 3 sp below, ch 2 (this is first dc) , * ch
3, dc in next ch space , ch 3, dc in next ch sp,* – around to beginning, sl st to
top of first dc made.
Your work
should be curling around the sides. Try
it on the rock and see how things are progressing.
Here is
where you might need to make one more round like round 5 to accommodate your
particular rock – it’s a judgement call at this point.
Round 6:
sl t to middle of ch 3 sp at beginning of last round, ch 2 – this is
your first dc) ch 2, make one dc in middle of next ch 3 sp ch 2, around. Sl st to top of beginning ch 2.
Fit your
work over the rock. It should be
snug. The next and last round is done
working with the rock inside your work.
Round
7: Ch 2, hdc in next ch 2 sp –
around. Sl st into 2nd ch at
beginning. Pull tight and end off and
tail in end.

You can have a bit of fun with these babies - and you can make them big or small - give them away, leave them for people to find, or put them in your own garden. You'll never look at rocks the same way again - I guarantee it.
love this idea and thanks for sharing the patterns~!
ReplyDelete:-)
libbyQ