For those of you who have asked, and who are curious about making socks, I've put together this tutorial on the fine art of making socks: Now, this is not beginner knitting we are going for here. In order to accomplish this you must know how to knit, purl, increase and decrease, and be at least willing to tackle knitting in the round from needle to needle.
Your supply list is as follows: One 100gram ball of sock weight yarn and one set of 5 double pointed needles in size 2.5 mm to 3mm - depending on how tightly you knit. You will also need scissors, and a tapestry needle for tailing in your ends once the sock is complete.
Stitches used:
k1p1 – Knit one, purl one ribbing
St
– stitch
St
st – stocking stitch
K
– knit
P
– purl
Sl1
– slip one stitch
Ssk
– slip one stitch, slip next stitch, knit together through the back loop
P2tog
– purl two stitches together
K2tog - knit two stitches together
Sl1k1 PSSO –
slip one stitch, knit one stitch, pass slipped stitch over knit stitch and off
needle
Note: The rule of thumb for
casting on stitches for socks is as follows:
Baby to toddler, cast on 40 stitches; Child size, cast on 48 stitches;
Woman size, cast on 56 stitches; Man’s sock, cast on 64 stitches.
For our purposes here, we will cast on enough stitches to make a woman's sock. Are you ready?
Using the long tale cast on method (or the cable cast on
method), cast on 56 stitches to make a sock sized for a woman. The objective here is to have an elastic
cast on for ease of getting the sock on when it is complete.
Divide the 56 stitches you have just cast on onto 4 needles
as follows: K1Pl for 14 stitches, now
pick up a new needle, k1pl the next 14 stitches, pick up new needle, k1p1 next
14 stitches, pick up new needle k1p1 last 14 stitches.
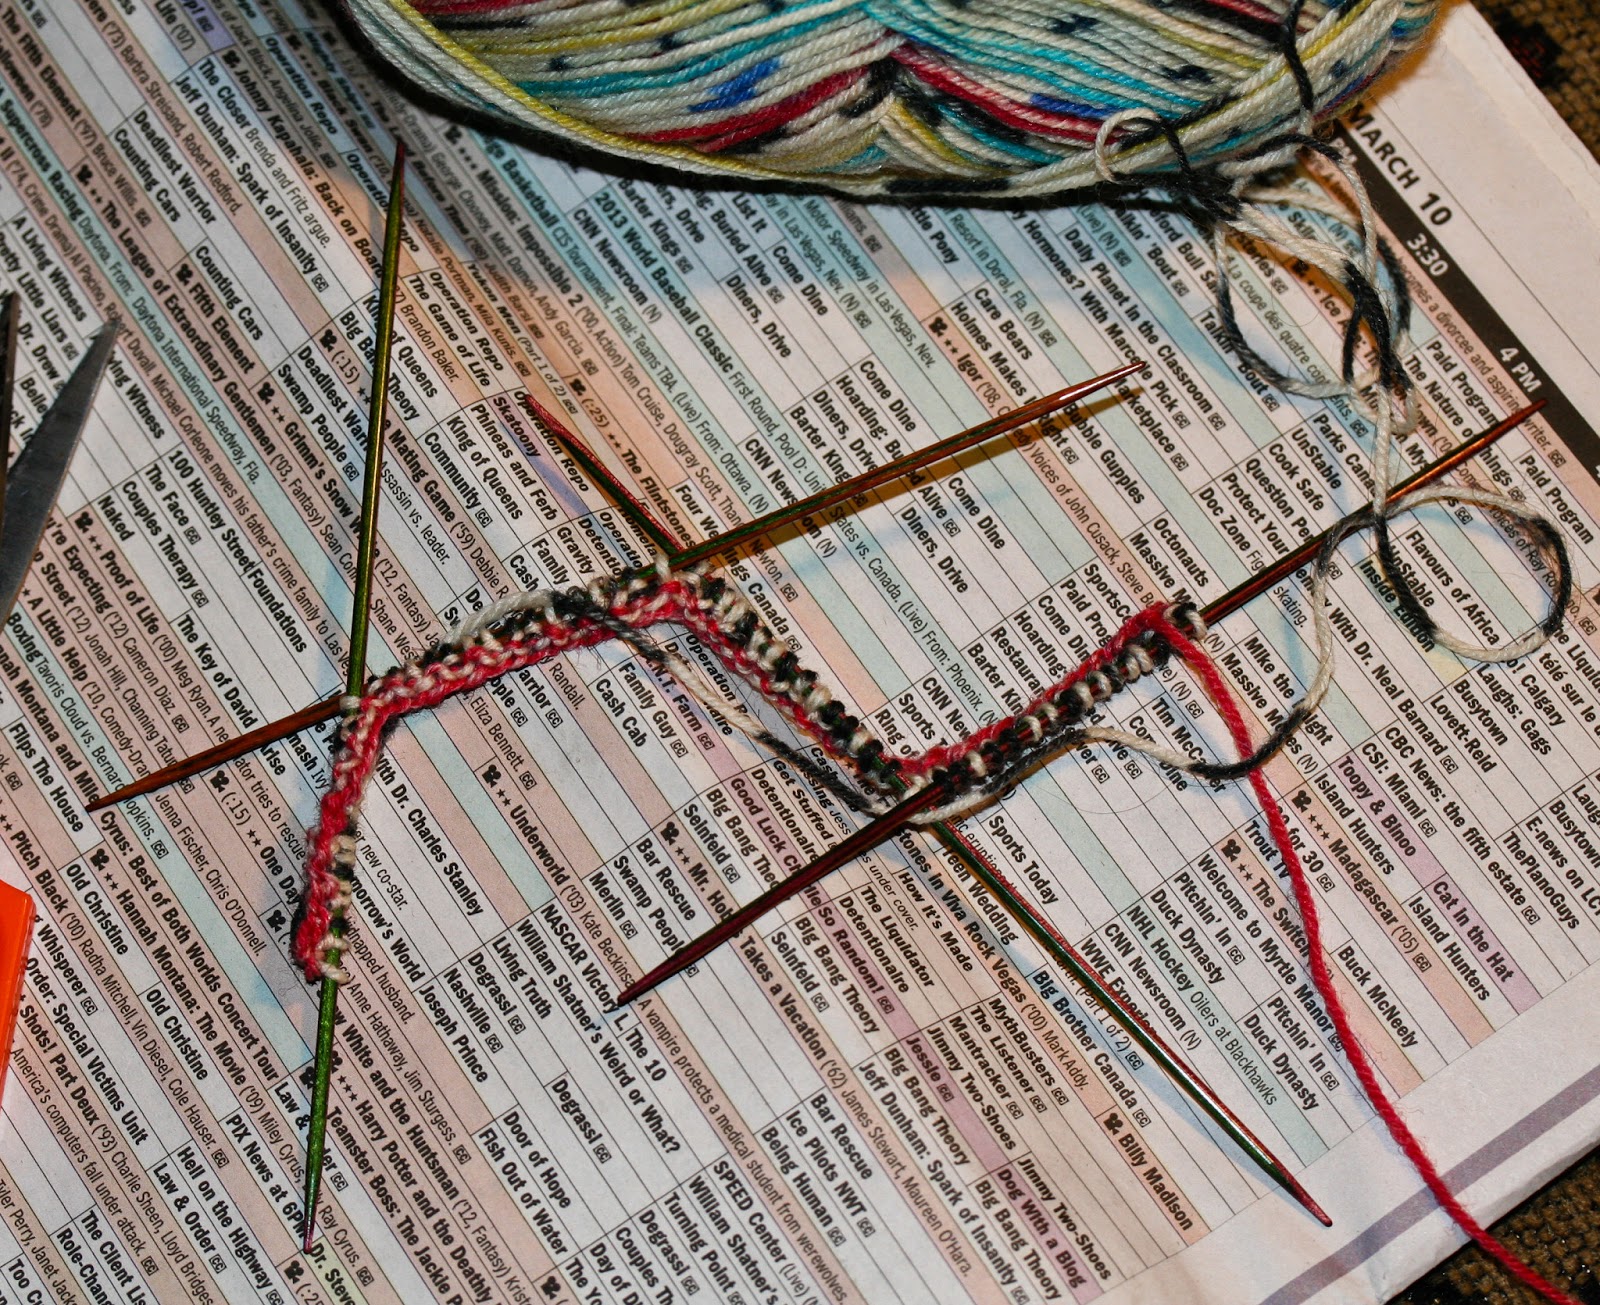
Your stitches are divided onto 4 needles, and your fifth needle is empty
This is what it looks like:
Making sure there are
no twists and your stitches are hanging straight on the four needles, bring
needle #4 around to meet up with
needle
#1.
Next : transfer the
first stitch on needle #1 onto the end
of needle #4, now take the last stitch on needle #4 over that transferred
stitch, and put it at the beginning of needle #l. You have successfully crossed these two stitches
and joined your 4 needles into a square and in the process tightened up the join
so there will be no annoying gap at the beginning of the rib..
So far so good? Let's move on.
Note: leave your cast on tale fairly
long to mark the middle of the heel and for ease of darning it in later. Laying your square flat, moving clockwise
around it, needle #1 is always the first needle on the left of the tale,
needles 2 and 3 hold the stitches for the front or instep of the sock, needle
#4 makes up the other side of the heel stitches.
Keep in mind you
are making a tube. And now that you have closed the tube, even though it looks like a square at the moment - we are going to make the leg of the sock as follows:
Next row: k1p1
around clockwise. Continue K1p1 pattern
for 2 inches, ending where your tail hangs at the end of needle #4.
Begin stocking stitch (St st) for 4 more inches to
complete the rest of the leg tube,
ending with needle #4 again. The length
of your tube leg should be approximately 6 inches from the cast on edge. And you are now ready to make the heel, starting with the back, which we call the flap.
Heel flap
The Heel flap is knitted on two needles back and forth
Row 1, Knit across Needle #1, turn your work.
Row 2, Slip first
stitch purlwise, purl across #1 to end , purl
all the stitches from needle #4 onto the same needle
You should now have 28 stitches on
one needle, leaving needle #2 and 3 resting at the front of the sock, one spare
needle stowed safely in your kit bag, and one empty needle ready to work
with. Don’t worry about Needles 2 and 3.
Their turn comes later.
*Row 3, Sl1k1
across the 28 stitches, turn.
Row 4, sl1, purl
across, turn* Note the asterisks – row 3 and row 4 make up the heel flap pattern
repeat.
Repeat rows 3 and 4
twelve more times, ending with a purl row and ready to knit the next row. Note: You have actually completed 28 rows and it should look like the picture.
You're now ready to take part in the magical part of sock knitting - turning the heel. Suspend your disbelief, take a deep breath and go for it.
Turning the Heel
The heel I’m going to teach you is called the Round Heel
. There are other heels. If you enjoy Sock knitting, you’ll probably
want to explore them, but this is a beginning.
Continue knitting back and forth on two needs for the heel turning.
Knit 14 stitches,
Knit 2, slip 1, knit one, pass slip stitch over, knit 1, turn.
Next row: slip one, purl 5 stitches, purl 2 together,
purl one, turn
Next row: slip one, knit 6 st, sl1, k1s1 psso, k 1, turn
Next row: slip one, p7, p 2 tog, p1, turn
Note: you will notice a
pattern here – you are knitting and purling to one stitch before a gap, then
working over the gap by either a slk1 psso or purl 2tog. This short row knitting shapes the heel,
and will turn direction of the tube
Next row: slip one, k 8, sl1k1 psso, k1, turn
Next row: sl 1, p9, p2tog, p1, turn
Next row: sl 1, k 10,
Sl1k1 psso, k1, turn
Next row: sl 1, p 11,
p2tog, p 1, turn
Next row: sl 1, knit 12, sl1k1 psso, k1, turn
Next row: sl one, purl 13, p2tog, p1 turn
Next row: sl1, k 14, sl1k1 psso, , turn
Next row: sl1, p 13, p2tog, turn
You should have 15 stitches on your needle, and your heel is
turned…congratulations! You did it!
You are now ready to
pick up stitches for the gusset and get back to knitting in the round
THE HEEL GUSSET
Knit to the middle of the row – in this case, knit 7
stitches. Now, using the spare needle
which becomes needle #1, knit the last 8 stitches. With this same needle pick up 14 stitches
along the right side of your heel flap.
You will have 22 stitches on needle #1
Big hint!
If you pick up one extra
stitch right at the join before you start knitting across the instep stitches,
you will eliminate a very annoying hole that occurs between needles at that
spot. So even though the pattern says pick up 14 st
– grab that extra stitch at the bottom.
Your sock will look a lot tidier and you will be a lot happier with your
work.
Next row – with your empty needle knit st st across needles #2 and 3 - your instep
stitches.
Next row – you are now ready to pick up the next 14 or 15
stitches and join up your round – pick up the stitches, and then knit the last
7 heel stitches onto that same needle.
You are joined up once again and ready to begin work on the gusset
SHAPING THE GUSSET
*On the next round, starting with needle #1, knit to 3 sts
away from the end of needle #1, k2tog, k1.
Work st st across the instep stitches.
At the beginning of needle #4, k1, ssk, knit to end.
Next round: knit st
st around. *
Repeat these two rounds, decreasing at the end of needle #1
and beginning of needle #4, until you once again have 14 stitches on all 4
needles
You have now shaped the gusset and are ready to
knit the foot of your sock and it should look like this.
Let’s take a minute
to measure your foot –Remember you are knitting a custom sock for a
particular foot, in this case, your foot.
Measure from the middle of your heel to the tip of your big
toe. Write down this measurement.
Now measure from the tip of your big toe down to just where
the toe joins the ball of your foot .
Subtract your toe
measurement from your total foot measurement.
Write down this measurement.
The length of your sock foot is from the heel to the base of
your toes.
For instance – my foot is 9-1/2 inches long from
the middle of my heel to the tip of my big toe. My toe measures 1/34 inches. Therefore I will knit the foot of my sock to
approximately 7-3/4 inches before I start my decreases to shape the toe of my
sock.
Once you have measured your foot and are back to having the equal number of stitches on each occupied needle, knit every round for the length you are making. Once you are there. It's time to shape the toe of your sock.
SHAPING THE TOE - once the foot of your sock is the length
you want it to be
Next round:
* Work to 3 sts away from the end of needle #1, k2tog, k1
K 1 SSK at beginning
of needle #2, knit to end
Work to within 3 sts from the end of needle #3, k2tog, k1
K 1 SSK at beginning
of needle #4, knit to end.
Next round – work plain in St st around.*
Work these two rounds until you have 28 stitches remaining, or 7 stitches per needle.
Next, work decreases as per first round, every round until
16 stitches remain, or 4 stitches per needle.
Next: Hold sock so
instep is facing you. Knit 4 stitches
from needle #2 onto needle #3 so 8 stitches are on front needle.
Turn your sock so the heel is facing you – Knit 4 stitches
from needle #4 onto needle #1 so 8 stitches are on back needle. The same number of stitches should be on each
needle, in this case 8 stitches each.
Three spare knitting needles can go into your
work bag. You are ready to close up the
toe of your sock and here is how you do it.
Closing the toe with kitchener Stitch
Hold the two knitting needles parallel to each other. Cut your yarn, leaving a fairly long tale.
Your yarn should be coming from the first right stitch on
the back needle. Thread the tail into your tapestry needle.
1.
Insert
tapestry needle into first st on front needle as if to knit, pull yarn through,
slip stitch off needle.
2.
Insert
needle into second st on front needle as if to purl, pull yarn through, leave
this stitch on the needle.
3.
Insert
needle into first st on back needle as if to purl, pull yarn through, slip
stitch off needle.
4.
Insert needle into second st on back needle as
if to knit, pull yarn through, leave stitch on needle.
Continue steps 1 to 4 until all stitches have been joined
and are off the needles.
Pull the yarn through to the inside of the sock and weave in
ends. Weave in the end on the cuff of
your sock .
Congratulations – Your
first sock is complete! On to the next
sock in the pair. After all – you have
two feet.